Having recently recorded some audio files for GPB’s new Doodly (video) series, for this article I thought I would focus on the voice and how we can make the most of it. Like many people, over the past year or more, I’ve been using my speaking voice in the virtual world far more often than I had previously.
In addition to regular group Zoom calls and MS Teams meetings, I’ve taught English to speakers of other languages and have hosted a radio show since the start of the year. All these environments can increase our awareness of how we come across to others.
Of course, the visual aspect is very important. However, in an audio-only environment such as radio, the voice becomes the focal point, as it does in a classroom where learners are not fluent in English.
In these situations, all those key vocal aspects we address when coaching public speakers become even more important, i.e. pitch height, pitch range, pitch modulation, loudness, pace and diction, as well as pronunciation. This is not only so that we speak clearly and are understood, it’s also to ensure that we are able to engage our audience, keep them interested and even inspired, not just by what we’re saying, but how we’re saying it.
It’s remarkable how much you can learn about your voice and its strengths and weaknesses in a situation where you need to be much more conscious of how you sound. When recording short audio links, it’s an almost immediate feedback loop. We couldn’t get into the studio on campus (Royal Holloway University where I’m currently studying for an MRes in Rhetoric and Oratory), no one was able to broadcast their show live. I’ve had to set up a crude recording studio in my home office. Although not ideal in terms of a controlled environment, this situation has its advantages.
The beauty of not broadcasting live is that if I don’t like the content, if my diction or pronunciation sounds dubious, or there are distortions, I can re-record the audio. That applies whether it is a link for a show or a section of a podcast interview.
Furthermore, if I think my voice sounds monotonous, it allows me to focus on optimising my pitch modulation and range, along with pacing, pitch height and loudness (though this is not as relevant with amplification).
There are techniques you can use to reduce sibilance (in this context, the hissing sound that can be created when using a microphone) produced by fricatives such as ‘f’, ‘s’, ‘v’ and ‘z’. The other jarring sounds for listeners that we need to be conscious of are the pops created by unvoiced plosives, such as (in English) ‘t’, ‘p’ and ‘k’ as well as voiced plosives ‘b’, ‘d’ and ‘g’. Other sounds that cause distortion with a microphone are ‘th’ and ‘sh’, but ‘p’ seems to be one of the worst offenders.
We can change scripts to some extent, of course, but it’s impossible to avoid these sounds completely. Our voices are all very individual, so we each need to find the microphone position that best suits us. The optimum solution in any situation where you will be using a microphone is, therefore, to do a sound check or test. This is essential if you will be in front of a live audience.
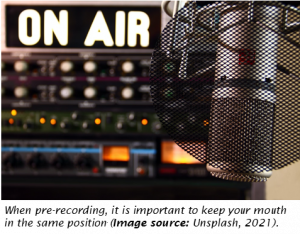
Regarding loudness, bear in mind that it is important for audio levels to be as consistent as possible whilst allowing for some volume range. Keeping your mouth in the same position is important, especially when recording chunks of audio. Not moving your head forwards or backwards or turning left or right whilst speaking should avoid this problem with a static boom mic. The same is true to a lesser extent if you’re using a lapel mic.
In a broadcast or podcast environment, you will often be pre-recording. As proximity to the microphone creates more intimacy, along with the fact that the listener will usually be listening on their own, perhaps with ear buds or headphones, distortions to sound quality can become more obvious.
So it’s important to strike a balance between that feeling of intimacy and minimising sound distortions that might distract or irritate the listener.
Having a high quality microphone helps, along with the ‘head basket’ (the wire mesh that surrounds some mics) or other shields, but distortions caused by plosives in particular can be avoided with good microphone technique. When in a recording studio, placing the mic slightly ‘off-axis’, i.e. to the side of your mouth, is very effective. You can also position the mic slightly above your mouth. That way, you capture the intimacy and the richness of your voice whilst avoiding the sound from the blasts of air produced by the plosives (aka ‘popping’) – or fricatives. With practice, it is possible to reduce the amount of air (pops) you produce with these sounds.
There are also bad habits we may not be aware of, such as starting a sentence with a smack of the lips, or making sounds produced when the tongue hits the palate or roof of the mouth (like a small tutting sound) are not uncommon but are unpleasant to hear when amplified.
Try to avoid exhaling through your nose too! These may take a little time to master, but minor tweaks will greatly improve the quality of your audio output and the experience of your listeners in the long-term.
References
- Unsplash (2021). Zoom meeting. Available from: https://unsplash.com/photos/smgTvepind4
- Unsplash (2021). Broadcasting. Available from: https://unsplash.com/photos/hddmXlPaFGo


